1、安装 certbot
以前安装 certbot 有一个叫做 certbot-auto 的脚本工具,但这个工具由于是用 python2 编写的,pythoh2 不维护后,官方也放弃了那些默认使用 python2 为默认 Python 的操作系统。
没有了那个certbot-auto,虽然会麻烦一些,但好在官方给的文档非常全,一般也不会有什么问题,具体可以去官方查看。
下面是我在 CentOS 7.2 上的安装 方法,供你参考。
第一步:安装 snapd,并启动它。
使用 snap 对内核有要求,太老的内核版本无法使用,我的内核版本是 3.10.0-1127.el7.x86_64 供你参考
# https://snapcraft.io/docs/installing-snap-on-red-hat
sudo yum -y install snapd
sudo systemctl enable --now snapd.socket
sudo systemctl start --now snapd.socket
sudo ln -s /var/lib/snapd/snap /snap
sudo snap install core; sudo snap refresh core
第二步:使用 snap 安装 certbot(如果你在此之前有使用系统自带的包管理器安装过 certbot,那么请你先卸载它)
sudo snap install --classic certbot
sudo ln -s /snap/bin/certbot /usr/bin/certbot
2、使用 certbot
有了 certbot 就可以用来申请证书、续费证书、部署证书了。
1、申请证书
使用如下 certbot 命令就可以开始证书的申请。以下自动完成申请,需要替换邮箱及自己的域名:
certbot --nginx --agree-tos --redirect \
        -m email@youremail.com --eff-email \
        --preferred-challenges http-01 \
        --cert-name url.com \
        -d url.com,xyz.url.com,www.url.com  -q
前提你得提前安装 nginx (这个自然不用说),安装过了但路径不对的话,需要你建立一个软链接
ln -s /usr/local/nginx/conf/ /etc/nginx
2、续期证书
certbot 的证书有效期是 3个月(准确的说应该是 90 天),这意味着你 3个月就要来处理一下续期。
续期的命令就比较简单了。
certbot renew
3、难用的 certboot
使用 cerbot 申请证书的时候,有许多交互界面需要你填入各种参数,允许各种协议,体验非常的不好。
并且最主要的是,在证书的申请和续期的过程中,有一步需要验证你对该域名的所有权,因此需要你人工登陆你域名提供商的控制台去添加类型为 txt 的 DNS 记录。
这导致了整个过程非常的繁琐,需要全程人工的界入。
而这繁琐的过程,不仅在你申请证书的时候要来一次,以后续费每次都要重复操作。
虽然各大国内域名提供商提供了 API 接口,可以让开发者调用去管理域名的 DNS 解析。
但 certbot 本身并未实现这个功能,这非常的遗憾。
4、好用的 letscertbot
但庆幸的是,certbot 的流程中保留了不少的 hook,开发者可以自行实现 DNS 的验证逻辑。
于是乎,就出现了一些有心的开发者,花时间写一些脚本,结合 certbot 来实现更多智能的工作。
在早期,有一个叫做 certbot-letencrypt-wildcardcertificates-alydns-au 在 github 项目,是基于 certbot-auto 的脚本。
之前不知道 certbot-auto 已经废弃了,让我试了半天,一直提示失败。
结果去 issue 上看,很多 issue 都没有处理,作者也已经一年没有在 github 上活跃过了。也许该项目是已经和 certbot-auto 的废弃而告终了。
于是我又开始漫天寻找新的解决方案。
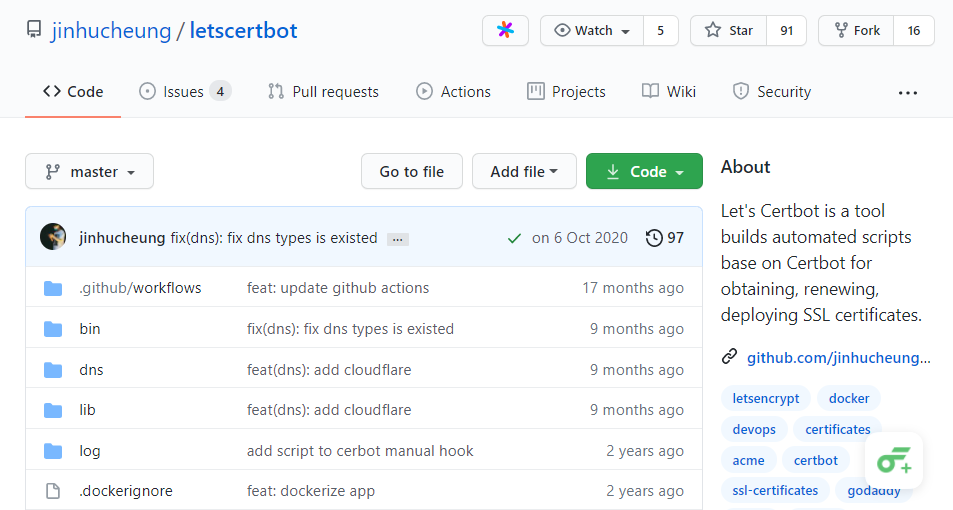
终于让我找到一个叫 letscertbot 的项目。

5、使用 letscertbot
使用letscertbot 的方法有两种
- 使用容器运行
- 使用脚本运行
我这里使用脚本运行演示。
在开始使用之前,你需要拷贝模板配置文件,并进行配置
cp config.json.example config.json
主要配置的项有:
base.email:填写你的邮箱,以便接收通知dns.aliyun:填写你的阿里云(如果你用的是阿里云域名的话)的授权id和密钥
阿里云的授权id怎么获取呢?
可前往阿里云的帮助文档:https://help.aliyun.com/knowledge_detail/38738.html
接下来我们就可以:
1、申请证书
申请的证书全部在 /etc/letsencrypt/live/ 目录下
sudo python ./bin/obtain.py -d your.example.com *.your.example.com
2、续费证书
sudo python ./bin/renewal.py
然后你可以将该命令部署到 cron 定时任务中,这个计划任务将每七天天执行 renewal 脚本,但是七天间隔太久,最好加上 --force 参数,强制续期。
0 1 * * * $your_letscertbot_home/bin/renewal.py --force >> /var/log/letscertbot-renewal.log 2>&1
**如果你只想续期某个域名,可以加上 **--certs 参数:
sudo python ./bin/renewal.py --certs xny.example.com --force
3、部署证书
如果你将 deploy.server.enable 设置为 true, Certbot 将执行 deployment 脚本 (deploy.py) 在 deploy 钩子上。这个脚本接收到已经续期的证书并将它推送到配置好的服务器中。
Let’s Certbot 通过 SSH 为远程服务器部署证书,这意味着你执行 Certbot 的机器须通过 SSH 连接上远程服务器。为了使连接成功,你需要上传公钥到远程服务器或者提供 deploy.server.password 给 sshpass 工具。
此外,为了将证书部署到 deploy.server.deploy_to 或重启 nginx, Let’s Certbot 要求 deploy.server.user 有执行对应操作的权限。
你可以通过执行下面命令获取 deployment 脚本:
sudo python ./bin/deploy.py --check
如果需要推送证书到配置中的服务器,可以执行:
sudo python ./bin/deploy.py --push --cert $certificate_name --server $server_host